Time to read: 6 min

Pad printing is a versatile and cost-effective printing technique that creates 2D images on objects with varying surfaces and shapes. From medical equipment to automotive parts, this process is invaluable across industries. This guide will explore the pad printing process, its advantages, disadvantages, and typical applications, providing a comprehensive understanding of this essential technique.
What is Pad Printing?
Pad printing, also known as tompography or tampo printing, is an indirect photogravure process that transfers images from a flat printing plate to 3D objects using a silicone pad and heat. This method is capable of producing detailed and high-quality images on uneven surfaces at a good speed.
History of the Pad Printing Process
Originally used for printing on items like china plates, pad printing has evolved from manual to automated processes, significantly increasing efficiency and productivity. The transition from soft gelatin to silicone pads and the advancement in printing plate materials have contributed to this evolution.
How Does Pad Printing Work?
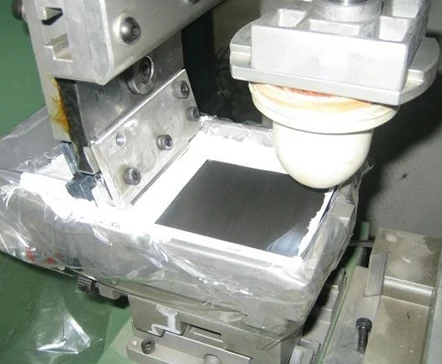
Understanding pad printing involves familiarizing oneself with the components of a pad printer, which include the pad printer itself, pad printing plate, pad print ink, pad print ink cup, and the printing pad.
Important Components of Pad Printers
- Pad Printer: Comes in open inkwell, closed ink-cup, and rotary gravure designs.
- Pad Printing Plate: Holds the image to be engraved, available in plastic and steel materials.
- Pad Print Ink: Contains resins, pigments, and thinners, with various series suitable for different objects and industries.
- Pad Print Ink Cup: Houses the ink and doctors the plate edge.
- Printing Pad: Transfers ink from the printing plate to the object, made from silicone with different mechanical properties for various applications.
The Pad Printing Process
The process involves several steps:
- Home Position: The ink cup sits over the etched printing plate and fills the etched part with ink.
- Exposure to Air: The ink cup closes and moves away, leaving ink in the etched part and making the upper layer of the ink tacky.
- Printing: The pad picks up the image and applies it to the object.
- Next Cycle: The ink cup returns to the home position to prepare for the next print cycle.
Tips for Successful Pad Printing
- Select the right type of pad considering hardness, shape, and size.
- Mix ink when necessary using the right pad printing technology.
- Avoid excessive pad pressure to prevent pad damage.
- Choose high-quality equipment for consistent results.
Advantages of Pad Printing
- Compatible with various surfaces and materials.
- Cost-effective and easy to operate.
- Delivers quality prints with support for multiple color options.
Disadvantages of Pad Printing
- Slower than some other printing techniques.
- Limited printing area for large objects.
- Potential color issues with large blocks of color.
Applications of Pad Printed Parts
Pad printing is used in industries such as medical, automotive, consumer appliances, sporting goods, cosmetics, and electronics for identification, traceability, branding, and decoration.
Pad Printing vs. Screen Printing
While both processes support multiple colors, pad printing is ideal for smaller, irregularly shaped objects, and screen printing is better suited for large-scale projects on flat surfaces.
Conclusion:
Pad printing is a highly accurate and efficient process for transferring 2D images onto objects of various dimensions and shapes. With the right materials and components, this process offers a thorough understanding and application in diverse industries.


